
In part 1 we have created and deployed Service. (AttributeTableConfigService). Now we need to create XML file from .csv that can be compiled with AIF schema. That can be done as it was already mentioned in part 1 by using .NET assembly transformation.
To create this transform we need to copy XML schema file (.xsd) of AttributeTableConfigService and wrap it around an envelope. To define what service we are calling we need to add appropriate header.
We can find .xsd for AttributeTableConfigService by accessing register services:
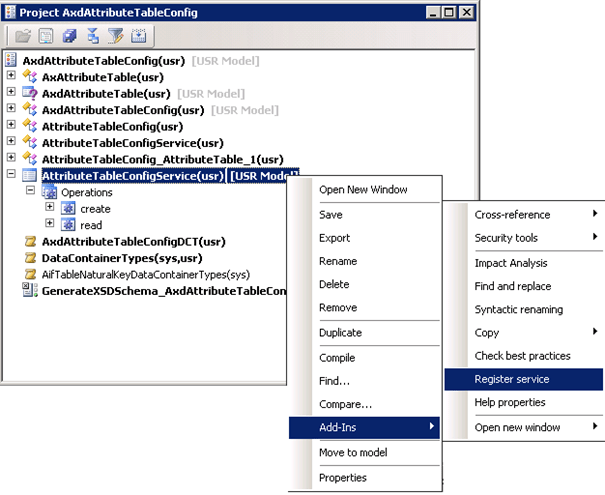
The AiF Services window should pop up.
There we look for our service, select and follow red arrows:
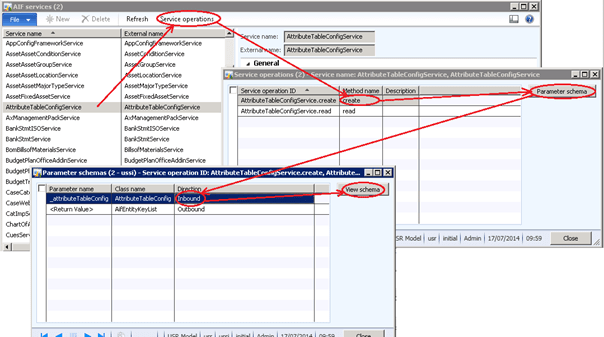
Click View schema:
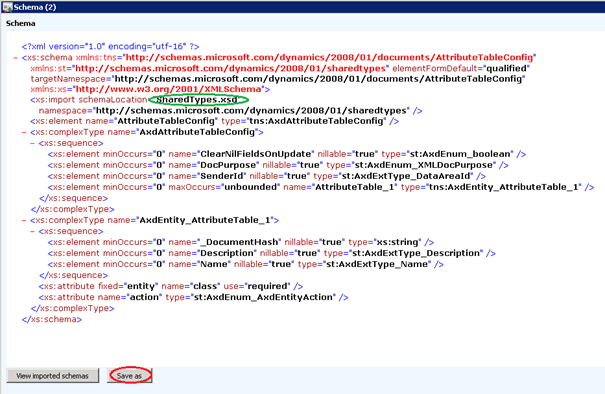
Click Save us and save it somewhere where it should be safe. By simple inspection of this schema we can see that imported schema marked by green circle is also there so we need to also save this file. We can do this by selection View imported schemas -> Save as.
The envelope file Message.xsd can be found in:
C:\Program Files\Microsoft Dynamics AX\60\Server\MicrosoftDynamicsAX\bin\Application\Share\Include
Also copy this file somewhere because it will be needed.
Ok, now when we have got our three xsd files we need to create transformation library. To do this first open the Visual Studio and then select Visual C# Class Library:
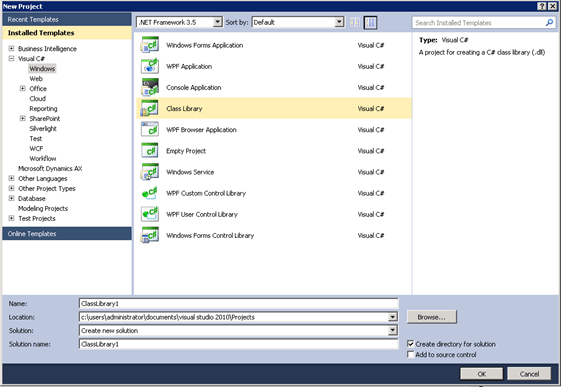
Here you need to select .NET Framework 4 and chose an appropriate name for example AttributeImport.
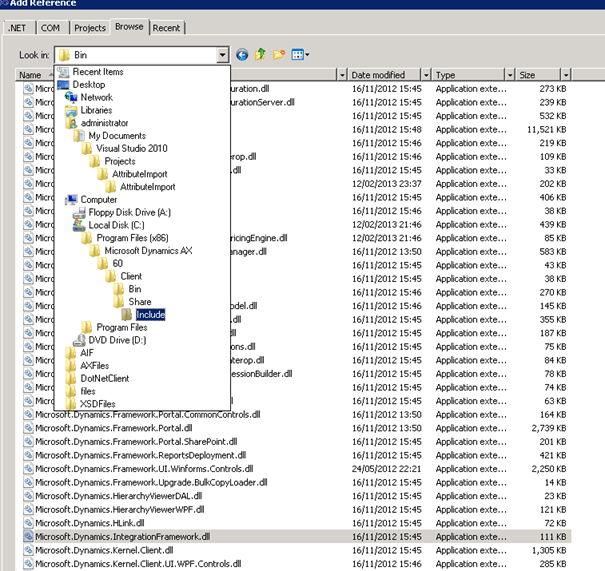
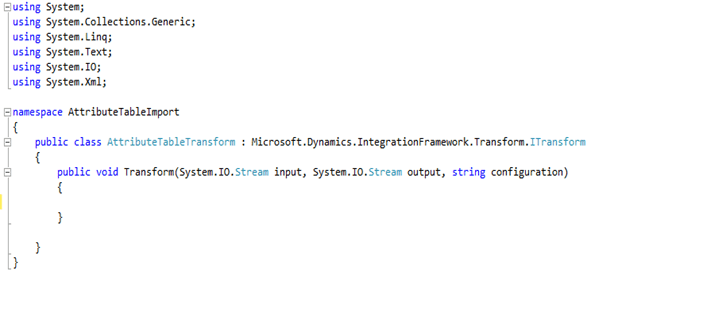
.NET assembly is a dll that contains a special class which when processing a request gets called from the AIF pipeline. This class must implement ITransform interface,e which is located in the assembly file Microsoft.Dynamics.IntegrationFramework.dll. ITransform contains method Transform that contain the code that transform the message.
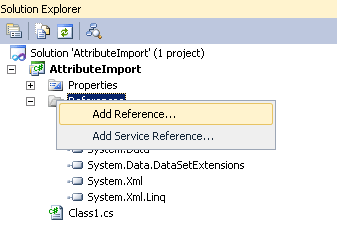
This assembly file can be added as a reference:
And then in Browse tab find and select this file and click ok button:
Now we will make use of those three files that we saved. We need to somehow add them to our project and attach important information from our csv file and then serialize them.
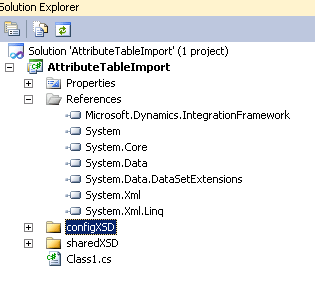
To store them we can create New Folders in our project:
In order to create classes that can be later added to our project we can use command xsd in Visual Studio Command Prompt.
For Message.cs:
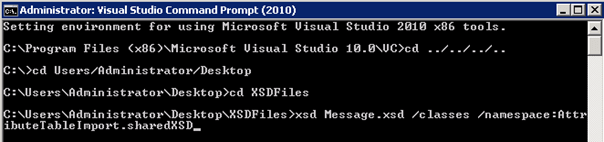
For AttributeTableConfig_SharedTypes.cs:
Classes are created in XSDFiles destination, now we can add them to the folder in our project by Right Click -> Add -> Existing Item.
Now we have access to the AttributeTable and we can start writing code.
Lets start from creating a class ITransform interface that has one method Transform in which will be writing all the code for the correct transformation:
CSV file that we want to import from will be send as a parameter input stream ( input ), from which we can read data using the following code:
StreamReader sreader = new StreamReader(input);
string[ ] dataArray; string lineIn = sreader.ReadLine( );
List<configXSD.AxdEntity_AttributeTable_1> attributeTableList = new List<configXSD.AxdEntity_AttributeTable_1>( );
while (lineIn != null)
{
dataArray = lineIn.Split(‘,’);
lineIn = sreader.ReadLine( );
configXSD.AxdEntity_AttributeTable_1 attributeTable = new configXSD.AxdEntity_AttributeTable_1( );
attributeTable.Name = dataArray[0];
attributeTable.Description = dataArray[1];
attributeTableList.Add(attributeTable);
}
sreader.Close();
Serialization and xml file creation should look as follows:
onfigXDS.AxdAttributeTableConfig item = new configXDS.AxdAttributeTableConfig( );
item.AttributeTable_1 – attributeTableList.ToArray( );
StringWriter stringWriterItems = new StringWriter( );
//serialize to xml
System.Xml.Serialization.XmlSerializer serializer = new System.Xml.Serialization.XmlSerializer(typeof(configXSD.AxdAttributeTableConfig));
serializer.Serialize(strongWriterItems, Item);
//put inside the envelope
sharedXSD.EnvelopeType envelope = new sharedXSD.EnvelopeType( );
sharedXSD.HeaderType header = new sharedXSD.HeaderType( )
{
MessageId = Guid.NewGuid( ).ToString(“8”),
Action = @”http//schemas.microsoft.com/dynamics/2011/01/services/AttributeTableConfigService/create“
};
envelope.Header = header;
sharedXSD.BodyType bodyType = new sharedXSD.BodyType( );
//Load item data xml string into an XML DocumentXmlDocument xmlDocumentItems = new XmlDocument( );xmlDocumentItems.LoadXml(strongWriterItems.ToString( ));
//set the body to documentbodyType.MessageParts = xmlDocumentItems.DocumentElement;envelope.Body = bodyType;
//serialize to outputstreamSystem.Xml.Serialization.XmlSerializer mainSerializer = newSystem.Xml.Serialization.XmlSerializer(typeof(sharedXSD.EnvelopeType));mainSerializer.Serialize(output, envelope);
It should be the same as Namespace in AIF services
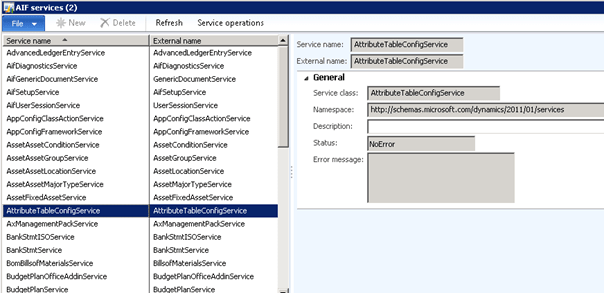
AttributeTableConfigService is External name and create is the name of the service operation.
This basically concludes this part of the tutorial. In part 3 we will show how to create the File system adapter.
